> ## Documentation Index
> Fetch the complete documentation index at: https://docs.nexusapi.link/llms.txt
> Use this file to discover all available pages before exploring further.
# Quick start in 5 minutes
> Make your first model request with NexusAPI.
This guide walks you through your first request. You only need a NexusAPI account and available credit.
**The shortest path**
Purchase credit → Create an API key → Copy a model ID from the Model Marketplace → Send a test request
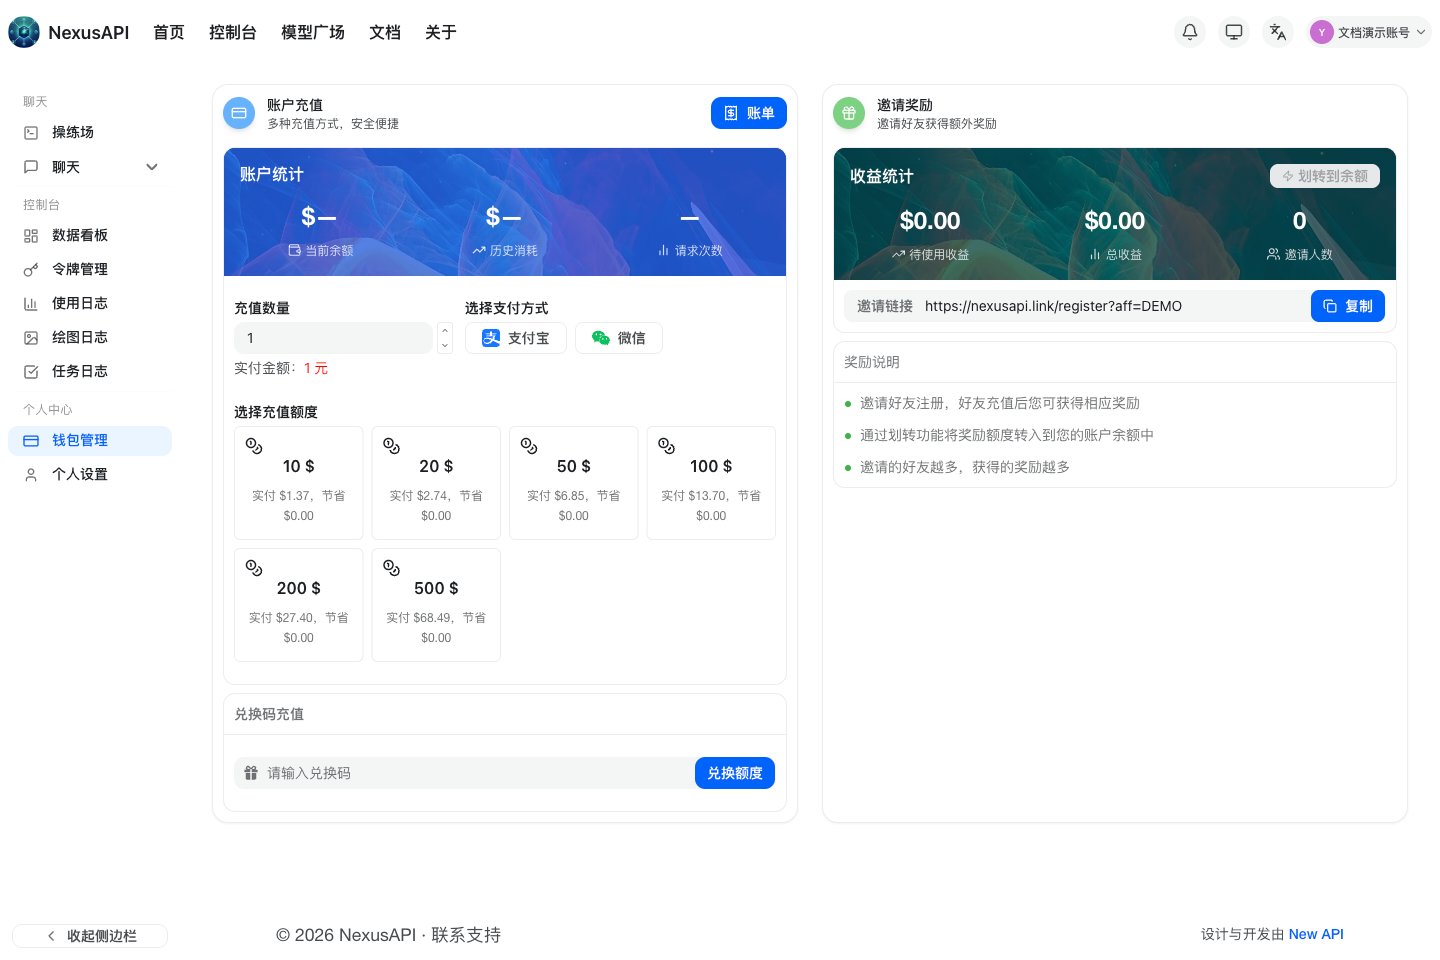
## 1. Purchase credit
Sign in to the console, then use **Wallet Management** to top up online.
 ## 2. Create an API key
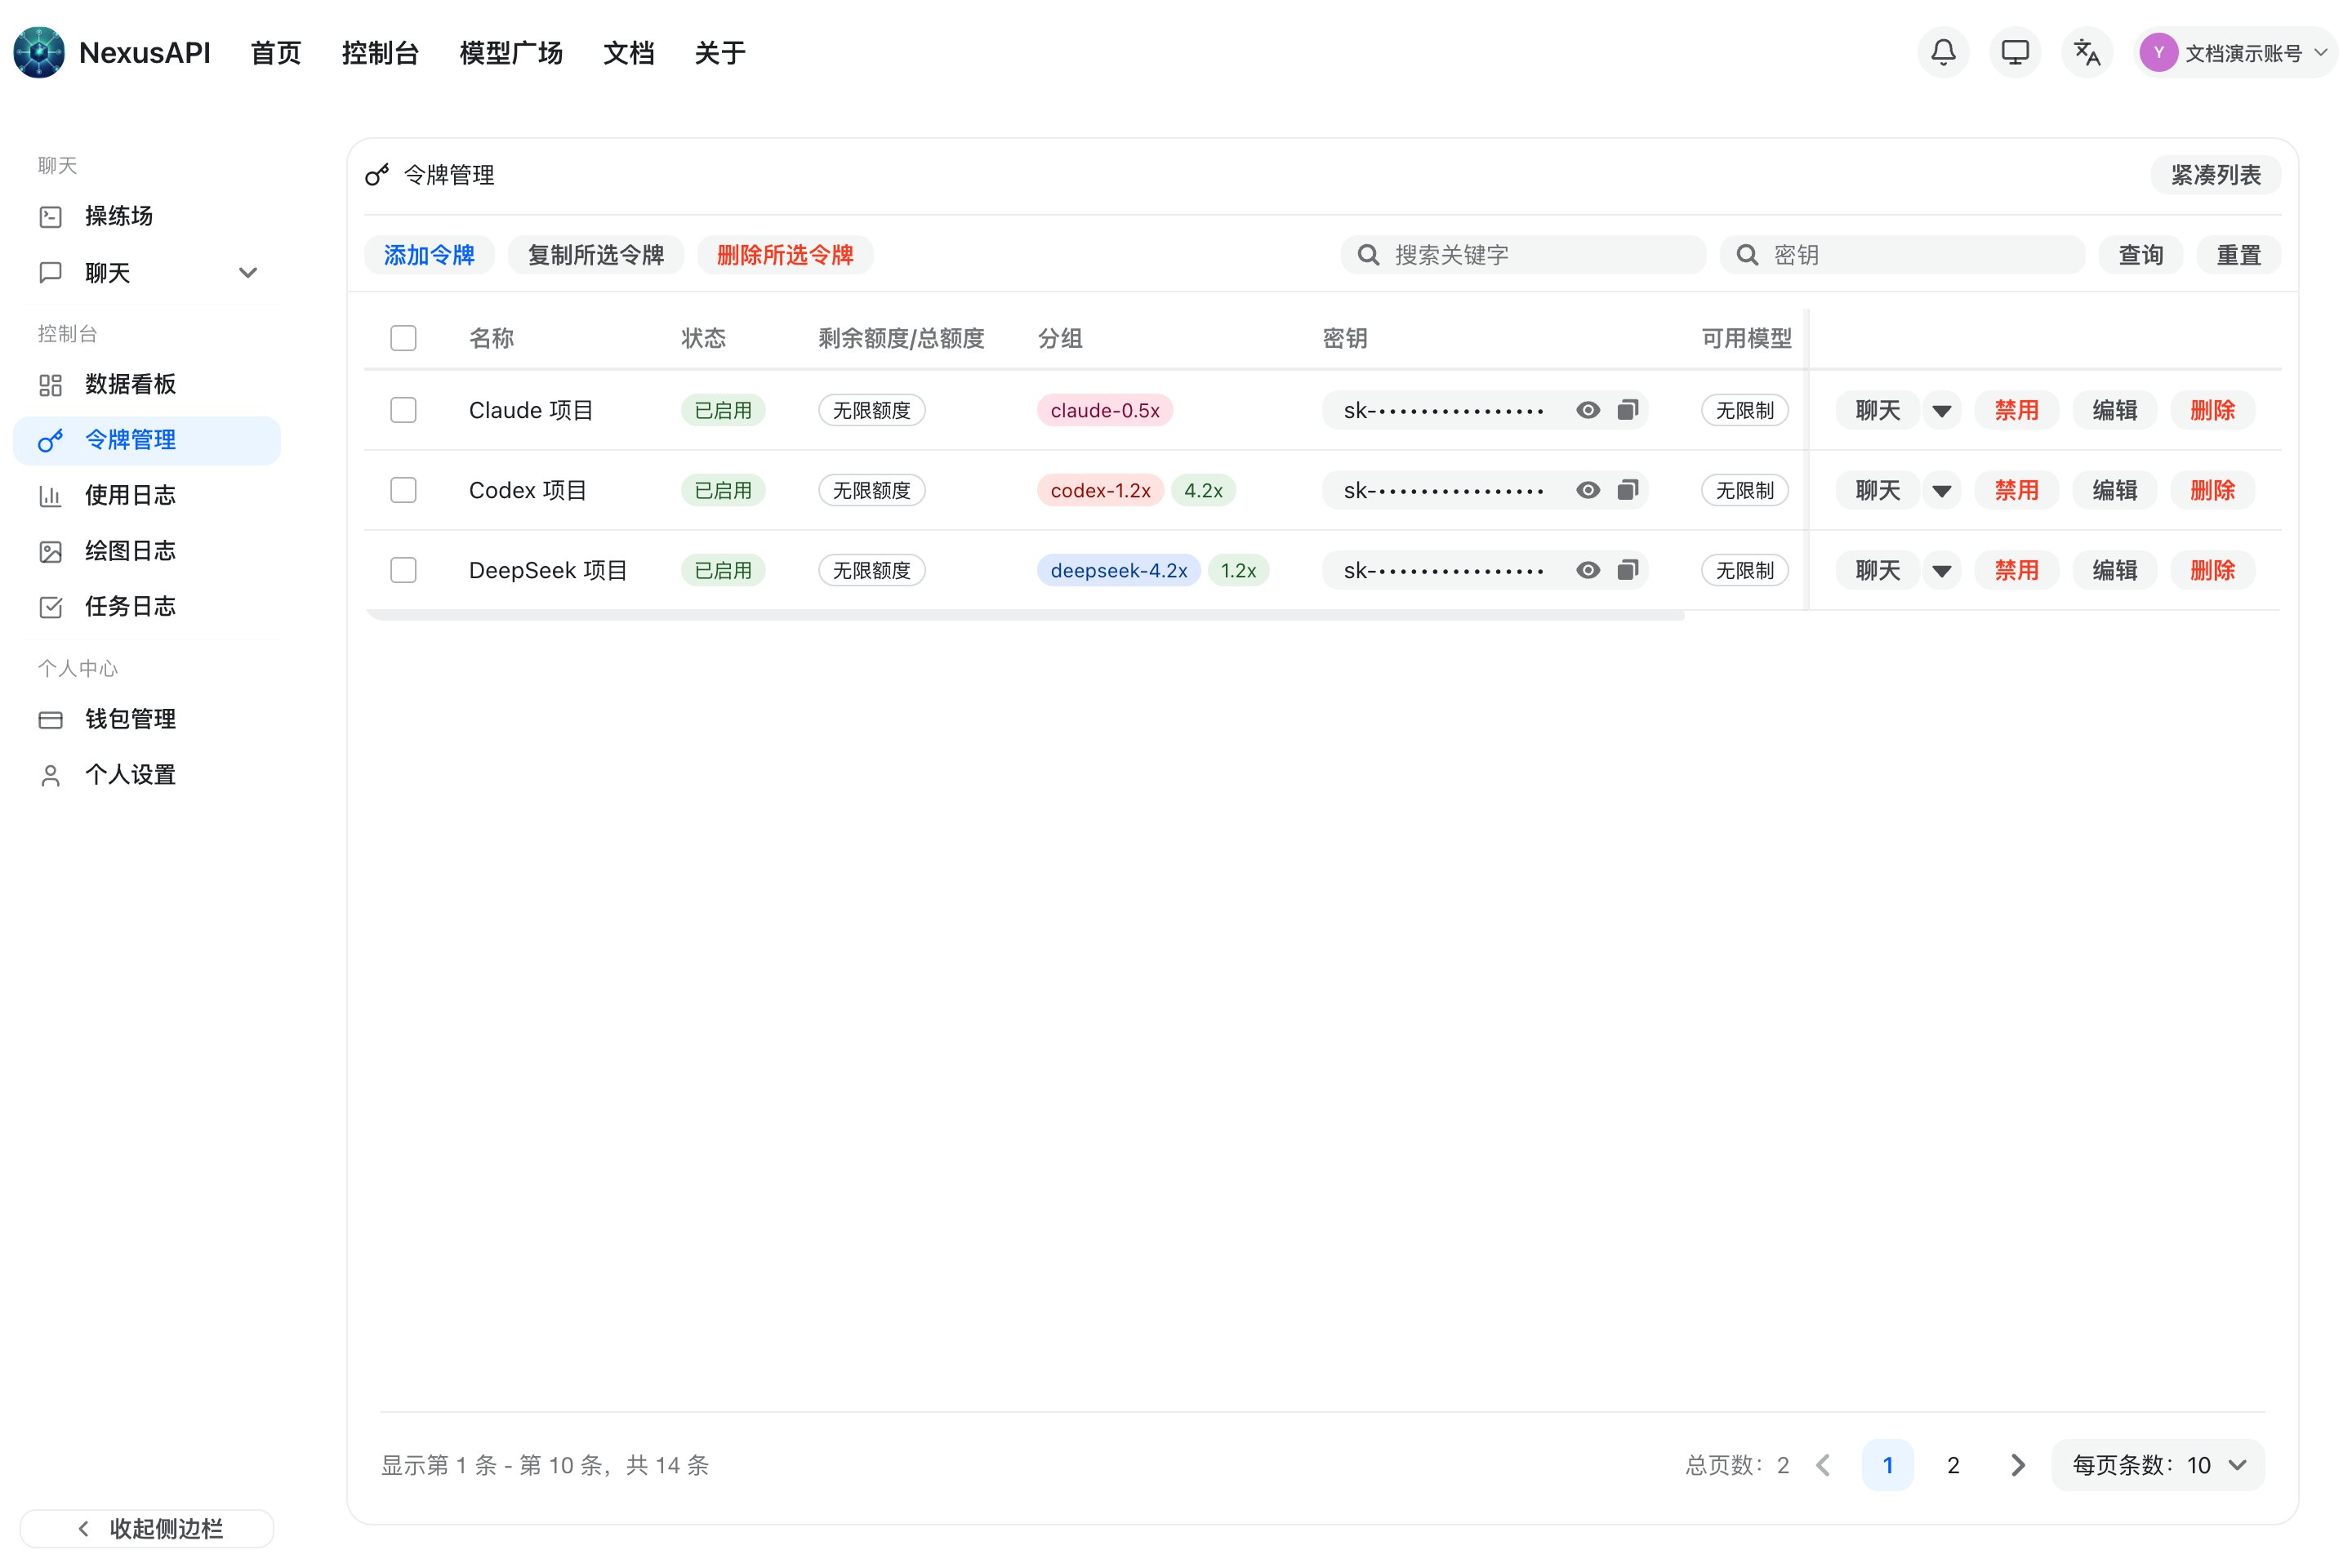
1. Open **Token Management** in the console.
2. Select **Add token**.
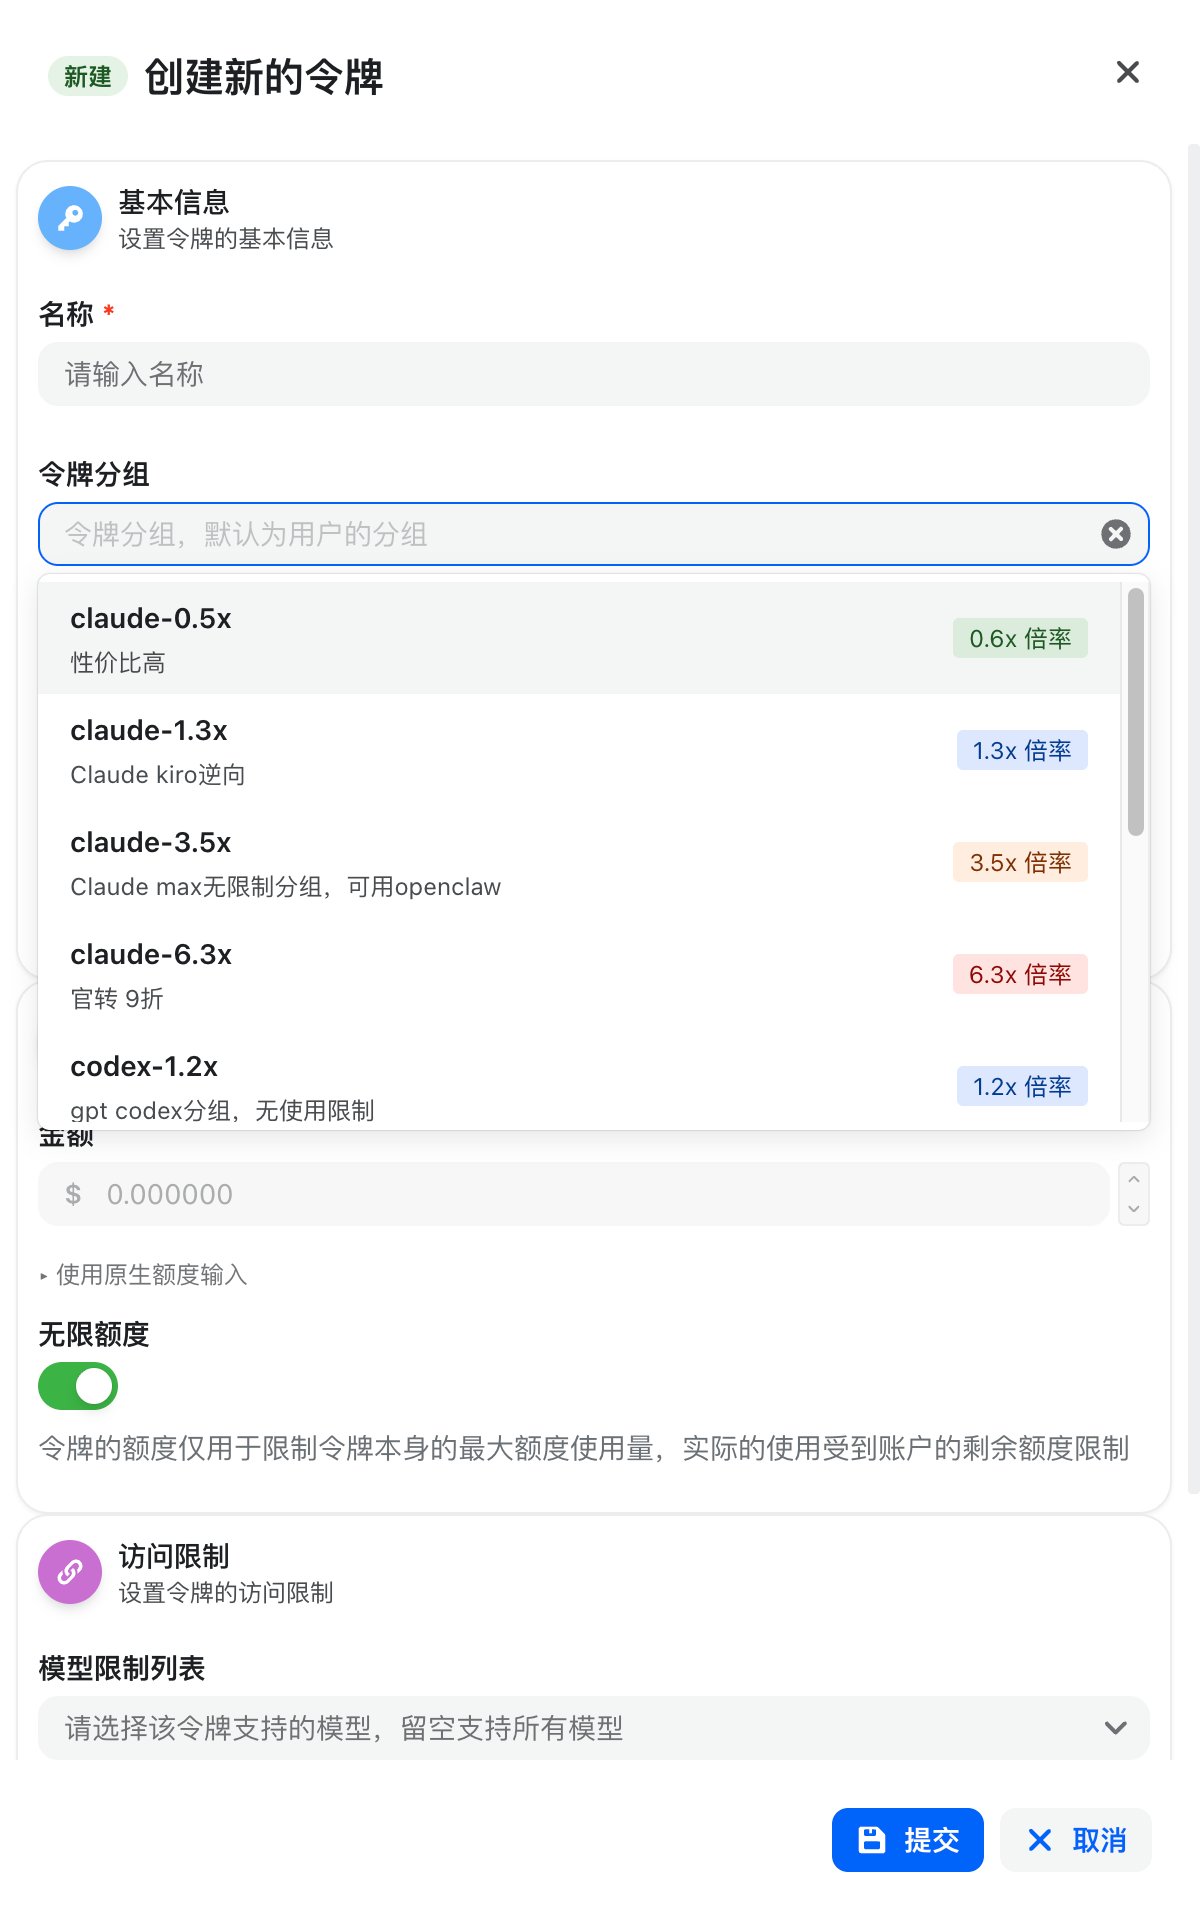
3. Enter a recognizable name, such as `codex-work`.
4. Select a group that includes the model you want to use.
5. Set an appropriate limit for the use case, then submit.
## 2. Create an API key
1. Open **Token Management** in the console.
2. Select **Add token**.
3. Enter a recognizable name, such as `codex-work`.
4. Select a group that includes the model you want to use.
5. Set an appropriate limit for the use case, then submit.
 **Keep your API key private**
An API key is used only for authentication. Do not put it in public repositories, screenshots, or chat logs. Use separate keys for separate projects.
## 3. Configure the API
Prepare these three values:
| Parameter | Value |
| --------- | ------------------------------------------------------------------------------------- |
| Base URL | `https://nexusapi.link/v1` |
| API key | Generated in the console; it usually starts with `sk-` |
| Model ID | Copy the exact model name from the [Model Marketplace](https://nexusapi.link/pricing) |
## 4. Send a test request
The following example uses the OpenAI Chat Completions format. Replace `YOUR_API_KEY` and `YOUR_MODEL_ID`:
```bash theme={"system"}
curl 'https://nexusapi.link/v1/chat/completions' \
-H 'Content-Type: application/json' \
-H 'Authorization: Bearer YOUR_API_KEY' \
-d '{
"model": "YOUR_MODEL_ID",
"messages": [{"role": "user", "content": "Reply: connection successful"}]
}'
```
If the JSON response includes `choices` and a reply, your basic integration is working.
**Client URLs can be different**
Some clients automatically append `/v1` or a request path. When configuring Claude Code, Codex CLI, or another client, follow its dedicated [tool guide](/en/tools/claude-code) instead of copying this URL mechanically.
## Next steps
* [Understand integration options](/en/guide/integration-overview)
* [Review models, groups, and billing](/en/billing/models-pricing)
* [Start self-checking if something goes wrong](/en/faq/self-check)
**Keep your API key private**
An API key is used only for authentication. Do not put it in public repositories, screenshots, or chat logs. Use separate keys for separate projects.
## 3. Configure the API
Prepare these three values:
| Parameter | Value |
| --------- | ------------------------------------------------------------------------------------- |
| Base URL | `https://nexusapi.link/v1` |
| API key | Generated in the console; it usually starts with `sk-` |
| Model ID | Copy the exact model name from the [Model Marketplace](https://nexusapi.link/pricing) |
## 4. Send a test request
The following example uses the OpenAI Chat Completions format. Replace `YOUR_API_KEY` and `YOUR_MODEL_ID`:
```bash theme={"system"}
curl 'https://nexusapi.link/v1/chat/completions' \
-H 'Content-Type: application/json' \
-H 'Authorization: Bearer YOUR_API_KEY' \
-d '{
"model": "YOUR_MODEL_ID",
"messages": [{"role": "user", "content": "Reply: connection successful"}]
}'
```
If the JSON response includes `choices` and a reply, your basic integration is working.
**Client URLs can be different**
Some clients automatically append `/v1` or a request path. When configuring Claude Code, Codex CLI, or another client, follow its dedicated [tool guide](/en/tools/claude-code) instead of copying this URL mechanically.
## Next steps
* [Understand integration options](/en/guide/integration-overview)
* [Review models, groups, and billing](/en/billing/models-pricing)
* [Start self-checking if something goes wrong](/en/faq/self-check)